
To track signups and conversions in a Next.js App Router app without cookies, start a cookieless tracker from a client component in the root layout, then send each signup from the server code that created the account and each payment from your payment webhook. Page views need no code at all, and marketing buttons need only an HTML attribute.
The code in this guide uses invisit, the cookieless analytics tool we build, as of November 2026: @invisitdev/web 0.2.1 in the browser, @invisitdev/server 0.3.0 on the server, and Next.js 16. The practices hold for any analytics tool, and a table near the end maps each call to Plausible, Umami and PostHog.
Which events to send from the browser and which from the server
Send each event from the place where the thing it describes becomes true. A click happens in the browser, an account exists once your database says so, and a payment clears when Stripe tells your webhook. That one rule decides every call in this guide:
| What happened | Where it becomes true | How to send it |
|---|---|---|
| A page was viewed | The browser | Automatically, client-side navigation included |
| A marketing button was clicked | The browser | A data-invisit-event attribute |
| An account was created | Your route handler or server action | invisit.track() from @invisitdev/server |
| Someone is signed in | Your session | identify(user.id) in the browser |
| A payment cleared | Your payment webhook | invisit.track() with the visitor kept from checkout |
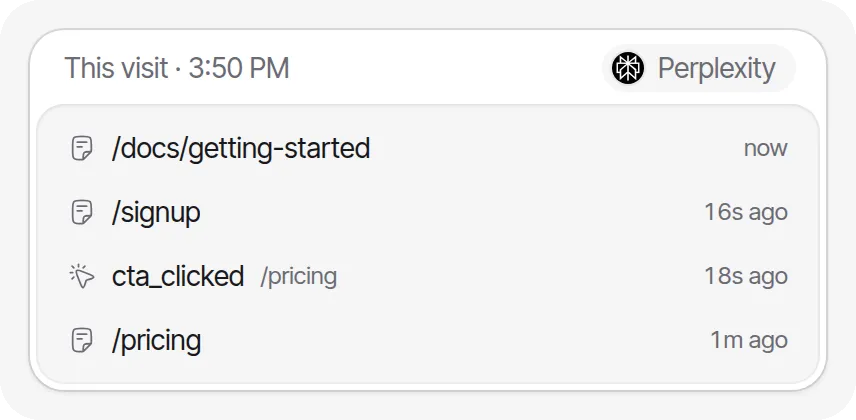
Server events still join the visit that the visitor’s browser started, so a signup sent from your route handler shows up with the source, landing page and country of the visit that produced it.
How to add analytics to the Next.js App Router
Install @invisitdev/web and start it from a client component rendered in the root layout. That is the documented Next.js setup: the tracker needs window, and useEffect only runs in the browser.
npm install @invisitdev/webimport { init } from '@invisitdev/web'
// The first call starts the tracker; every later call returns the same running tracker.
export const tracker = () => init({ site: process.env.NEXT_PUBLIC_INVISIT_SITE! })'use client'
import { useEffect } from 'react'
import { tracker } from '@/lib/analytics'
export function Analytics() {
useEffect(() => {
tracker()
}, [])
return null
}import { Analytics } from './analytics'
export default function RootLayout({ children }: { children: React.ReactNode }) {
return (
<html lang="en">
<body>
{children}
<Analytics />
</body>
</html>
)
}The site id comes from Settings → Installation in the dashboard. It is public, so a NEXT_PUBLIC_ variable is fine. React’s Strict Mode runs effects twice in development and still starts one tracker, because init() returns the running tracker on every later call; the conversion section reaches the tracker the same way.
The tracker sets no cookies and stores nothing about the visit on the device. Visitors are told apart with a keyed hash of the site, the date, the device and browser type and the IP address, mixed with a random salt for each UTC day. It is the same tracker as the about 8.5 KB invisit.js script. Whether that removes your cookie banner depends on where your visitors are; see our guide to cookie banners for analytics.
Does Next.js client-side navigation count as a page view?
Yes. The tracker records a page view for every new address the App Router navigates to, through <Link>, router.push() or the back button, with no code in your app. A change to the #fragment alone is not a new page.
Two details matter in Next.js. A router.replace() that changes only the query string, the way a search box writes ?q= as you type, records no new page view, while a router.push() to a new path or query records one. And you need no usePathname() effect to report route changes: the tracker wraps the History API itself and sees every navigation.
Outbound link clicks and file downloads are recorded as events on their own. Turn either off with outboundLinks: false or fileDownloads: false in init().
How to serve the tracker from your own domain in Next.js
Add @invisitdev/server to your proxy file and point the tracker at /_i. Tracker requests then go to your own domain, where blocklists that match analytics by third-party host never see them, and the collector gets each visitor’s real address from your server. Our post on analytics proxies covers the wider trade-off.
Create an API key with only the ingest scope under Settings → API keys. It starts with invisit_sk_ and is a secret, so it belongs in a server variable, never in a NEXT_PUBLIC_ one.
npm install @invisitdev/serverimport { createInvisit } from '@invisitdev/server'
export const invisit = createInvisit({ key: process.env.INVISIT_API_KEY! })import { NextResponse, type NextFetchEvent, type NextRequest } from 'next/server'
import { invisit } from './lib/invisit'
export async function proxy(request: NextRequest, event: NextFetchEvent) {
const response = await invisit.handle(request, { waitUntil: (p) => event.waitUntil(p) })
return response ?? NextResponse.next()
}
export const config = { matcher: ['/((?!_next/static|_next/image|favicon.ico).*)'] }import { init } from '@invisitdev/web'
// The first call starts the tracker; every later call returns the same running tracker.
export const tracker = () => init({ site: process.env.NEXT_PUBLIC_INVISIT_SITE!, baseUrl: '/_i' })Before Next.js 16, the file is middleware.ts and exports middleware. invisit.handle() answers the tracker’s requests under /_i, records search engine and AI crawler reads in the background, which are never billed, and resolves to null for every other request so your app answers it.
The proxy matters for the server events below too. A server event joins a visit only when it carries the address and browser the visit’s other events came from. api.invisit.dev answers over IPv6 as well as IPv4, so a visitor who has both can reach the collector over IPv6 while your app, if your host has no IPv6 address, sees them over IPv4. Through the proxy, both reach your domain with one address.
How to track button clicks in Next.js without JavaScript
Add data-invisit-event to the element. A click on it records an event with that name, and each data-invisit-prop-<key> attribute becomes a string property. <Link> passes the attributes through to the <a> it renders, so this works in a Server Component with no client code of your own:
import Link from 'next/link'

export default function Home() {
  return (
    <Link href="/signup" data-invisit-event="cta_clicked" data-invisit-prop-location="hero">
      Start free
    </Link>
  )
}
A click is the right trigger here, because the click is what you want to measure: interest in signing up, by button and by page. It is the wrong trigger for the signup itself. On a <form>, data-invisit-event records the submit, before your server has accepted or rejected anything.
Event names take 1 to 64 characters from A-Z a-z 0-9 _ . : -, and read best in the past tense: cta_clicked, signup_completed.
How to track signups only after the account is created
Send the signup event from the server code that inserts the user, after the insert succeeded. A failed validation, a taken email or a double click then never counts, and a password form, a Google sign-in and a magic link are all counted in the one function where each of them creates the user.
import { after } from 'next/server'
import { invisit } from '@/lib/invisit'
import { createUser } from '@/lib/users'

export async function POST(request: Request) {
  const user = await createUser(await request.formData())
  if (!user) return Response.json({ error: 'signup_failed' }, { status: 400 })

  // The account exists, so this is the moment to count it. after() sends the event once the
  // response is out, so a slow collector never delays the signup.
  after(() =>
    invisit
      .track('signup_completed', { request, userId: user.id, properties: { method: 'email' } })
      .catch(console.error),
  )
  return Response.json({ id: user.id }, { status: 201 })
}
request is the visitor’s own request, sent by their browser. Its address, user agent, Accept-Language and Sec-GPC header tie the event to their visit, so it lands with that visit’s source and landing page. With respectGpc: true passed to createInvisit, a browser that sends Global Privacy Control is not recorded, like the browser tracker’s option of the same name, and userId is hashed on arrival like identify().
after() from next/server runs the call once the response has been sent. The SDK gives up on the collector after 10 seconds anyway, but nobody should wait on analytics to get an account. track() rejects on any failure, so keep the .catch(): a lost event must never fail a signup.
The form itself sends nothing, so clicking Create account counts nothing until the server has answered:
'use client'
import { useRouter } from 'next/navigation'
import { useState } from 'react'

export function SignupForm() {
  const router = useRouter()
  const [failed, setFailed] = useState(false)

  async function onSubmit(event: React.FormEvent<HTMLFormElement>) {
    event.preventDefault()
    const response = await fetch('/api/signup', {
      method: 'POST',
      body: new FormData(event.currentTarget),
    })
    if (!response.ok) return setFailed(true)
    router.push('/onboarding')
  }

  return (
    <form onSubmit={onSubmit}>
      <input name="email" type="email" required />
      <input name="password" type="password" required />
      <button type="submit">Create account</button>
      {failed && <p role="alert">That did not work. Check the form and try again.</p>}
    </form>
  )
}
In a server action
A server action gets no Request, but headers() from next/headers holds every header track() reads, so wrap them in one:
'use server'
import { headers } from 'next/headers'
import { redirect } from 'next/navigation'
import { after } from 'next/server'
import { invisit } from '@/lib/invisit'
import { createUser } from '@/lib/users'

export async function signUp(formData: FormData) {
  const user = await createUser(formData)
  if (!user) redirect('/signup?error=1')

  // A server action gets no Request. track() reads only headers, and headers() has them all.
  const request = new Request('https://example.com/signup', { headers: await headers() })
  after(() => invisit.track('signup_completed', { request, userId: user.id }).catch(console.error))
  redirect('/onboarding')
}
How to identify signed-in users without sending personal data
Call identify(user.id) in the browser once the session is known, with the opaque id from your database. invisit hashes the id on arrival and keeps only the hash, attached to the visit. The same id always gives the same hash on a site, so one person’s visits line up across devices and days.
The signed-in layout is the place for it, since every sign-in path ends there:
'use client'
import { useEffect } from 'react'
import { identify } from '@invisitdev/web'

export function IdentifyUser({ id }: { id: string }) {
  useEffect(() => {
    identify(id)
  }, [id])
  return null
}import { requireUser } from '@/lib/auth'
import { IdentifyUser } from './identify-user'
export default async function AppLayout({ children }: { children: React.ReactNode }) {
const user = await requireUser()
return (
<>
<IdentifyUser id={user.id} />
{children}
</>
)
}An id can be up to 128 characters. Calls made before init() are queued, so it does not matter whether IdentifyUser or <Analytics /> runs first, and identify calls are never billed. The server’s userId produces the same hash, so server events and browser visits line up on it. Never pass an email address or a name: the database id already does the job.
When to use conversion() instead of a server event
In invisit, a conversion is an event you mark as a goal: it is listed under Conversions in the Events report and counts toward the site’s conversion rate. Only the browser tracker sends conversions, through conversion() on the tracker that init() returns. Events from @invisitdev/server always arrive as ordinary custom events, and funnels treat both alike.
So decide, per goal, which kind it is, and send it from one place only. To have password signups under Conversions, remove the after() block from the route handler and call conversion() in the form’s success branch, which runs only once the server has answered with a 201:
import { tracker } from '@/lib/analytics'

// In SignupForm's onSubmit, once the server has answered:
if (!response.ok) return setFailed(true)
tracker()?.conversion('signup_completed', { method: 'email' })
router.push('/onboarding')
The trade-off is coverage. A Google sign-in or a magic link creates the account in a callback that redirects, with no success branch in your form to call from, and only the server event counts those. Use conversion() for goals that finish in one browser flow, and server events for facts that arrive by several paths or with no browser at all, like the payment below.
How to track Stripe payments from the webhook
Keep the visitor’s address and user agent when they start checkout, then send the purchase from the webhook with them. The webhook request comes from Stripe’s servers, with Stripe’s address and user agent, so on its own it cannot be tied to anyone’s visit.
import { clientIp } from '@invisitdev/server'
import { requireUser } from '@/lib/auth'
import { saveCheckout } from '@/lib/checkouts'
import { stripe } from '@/lib/stripe'

export async function POST(request: Request) {
  const user = await requireUser()
  const session = await stripe.checkout.sessions.create({
    mode: 'subscription',
    line_items: [{ price: process.env.STRIPE_PRICE_PRO!, quantity: 1 }],
    client_reference_id: user.id,
    success_url: 'https://example.com/welcome?session_id={CHECKOUT_SESSION_ID}',
  })

  // Address and browser are what tie a server event to a visit. Keep them only until the
  // payment is reported; this site also keeps none for a browser sending Global Privacy Control.
  const gpc = request.headers.get('sec-gpc') === '1'
  await saveCheckout({
    sessionId: session.id,
    userId: user.id,
    plan: 'pro',
    visitorIp: gpc ? null : clientIp(request),
    visitorUserAgent: gpc ? null : request.headers.get('user-agent'),
  })
  return Response.json({ url: session.url })
}import { after } from 'next/server'
import type Stripe from 'stripe'
import { claimPaidCheckout } from '@/lib/checkouts'
import { invisit } from '@/lib/invisit'
import { stripe } from '@/lib/stripe'
export async function POST(request: Request) {
let event: Stripe.Event
try {
event = stripe.webhooks.constructEvent(
await request.text(),
request.headers.get('stripe-signature') ?? '',
process.env.STRIPE_WEBHOOK_SECRET!,
)
} catch {
return new Response('Invalid signature', { status: 400 })
}
if (event.type === 'checkout.session.completed' && event.data.object.payment_status === 'paid') {
// Marks the checkout paid and returns it, with its kept visitor, only on the first call:
// Stripe can deliver the same event more than once.
const checkout = await claimPaidCheckout(event.data.object.id)
if (checkout?.visitorIp && checkout.visitorUserAgent) {
const visitor = { ip: checkout.visitorIp, userAgent: checkout.visitorUserAgent }
after(() =>
invisit
.track('purchase_completed', {
visitor,
userId: checkout.userId,
properties: { plan: checkout.plan },
})
.catch(console.error),
)
}
}
return new Response(null, { status: 200 })
}clientIp() is the same address reader the proxy uses. saveCheckout and claimPaidCheckout are yours to write against your database; the second marks the row paid, clears the kept address and returns the row only the first time. Stripe’s fulfillment guide warns that fulfillment can run several times, even concurrently, for one Checkout Session, and Stripe retries undelivered events for up to three days in live mode. after() keeps the webhook’s answer fast, which matters: with a success_url set, Checkout waits up to 10 seconds for your webhook before it redirects the customer.
The purchase joins the visit that led to it when it arrives from the same address and browser while that visit is still going, on the same UTC day, since the visitor hash changes with the date. A card payment finishes while the visitor is still in checkout, so that usually holds. Plausible’s Events API docs describe the same limit for Plausible’s own visitor hash.
A SEPA or ACH debit confirms through checkout.session.async_payment_succeeded, possibly days later, and can no longer join, so leave it out. For the same reason a kept address is useless once its UTC day is over: delete any left from abandoned or unpaid checkouts within a day.
Revenue itself is better read from Stripe than added up from events. invisit’s Stripe connection reads payments, refunds, disputes, fees and net, backfills the last 90 days and charts them beside your traffic, so a debit that clears next week still lands in revenue. It does not attribute revenue to sources or campaigns; the purchase_completed event is what puts a purchase inside the visit and the funnel. See connect a provider.
How to keep preview deployments and your own visits out of analytics
Give previews their own site and key, allow only your domain on the production site, and mark your own browsers with #invisit-ignore.
- Create a second site for previews; the free plan has 4 sites and 20,000 events a month. Vercel lets you set each variable per environment, so give Preview and Development that site’s
NEXT_PUBLIC_INVISIT_SITEand ingest key, and Production the real ones. Every environment needs a key, becausecreateInvisitthrows when it is missing. Previews then report to a site where you can check your events before you merge. - On the production site, add your domain under Settings → Collection → Allowed domains. Events are then accepted only from that domain and its subdomains, so a stray
*.vercel.apppreview orlocalhostis refused. That check reads the browser’s origin, while server events are authenticated by the key, which is why step 1 matters. - Open any page of your production site with
#invisit-ignoreat the end of the address, once in each browser you use, your phone included. That browser stops being counted until you open#invisit-unignore. It only silences the browser: a test signup on production still sends its server event, so test on a preview. - Leave internal pages out with
excludePaths: ['/admin/*']next tobaseUrlinlib/analytics.ts. The matching rules are in excluding traffic.
How to build a signup funnel from these events
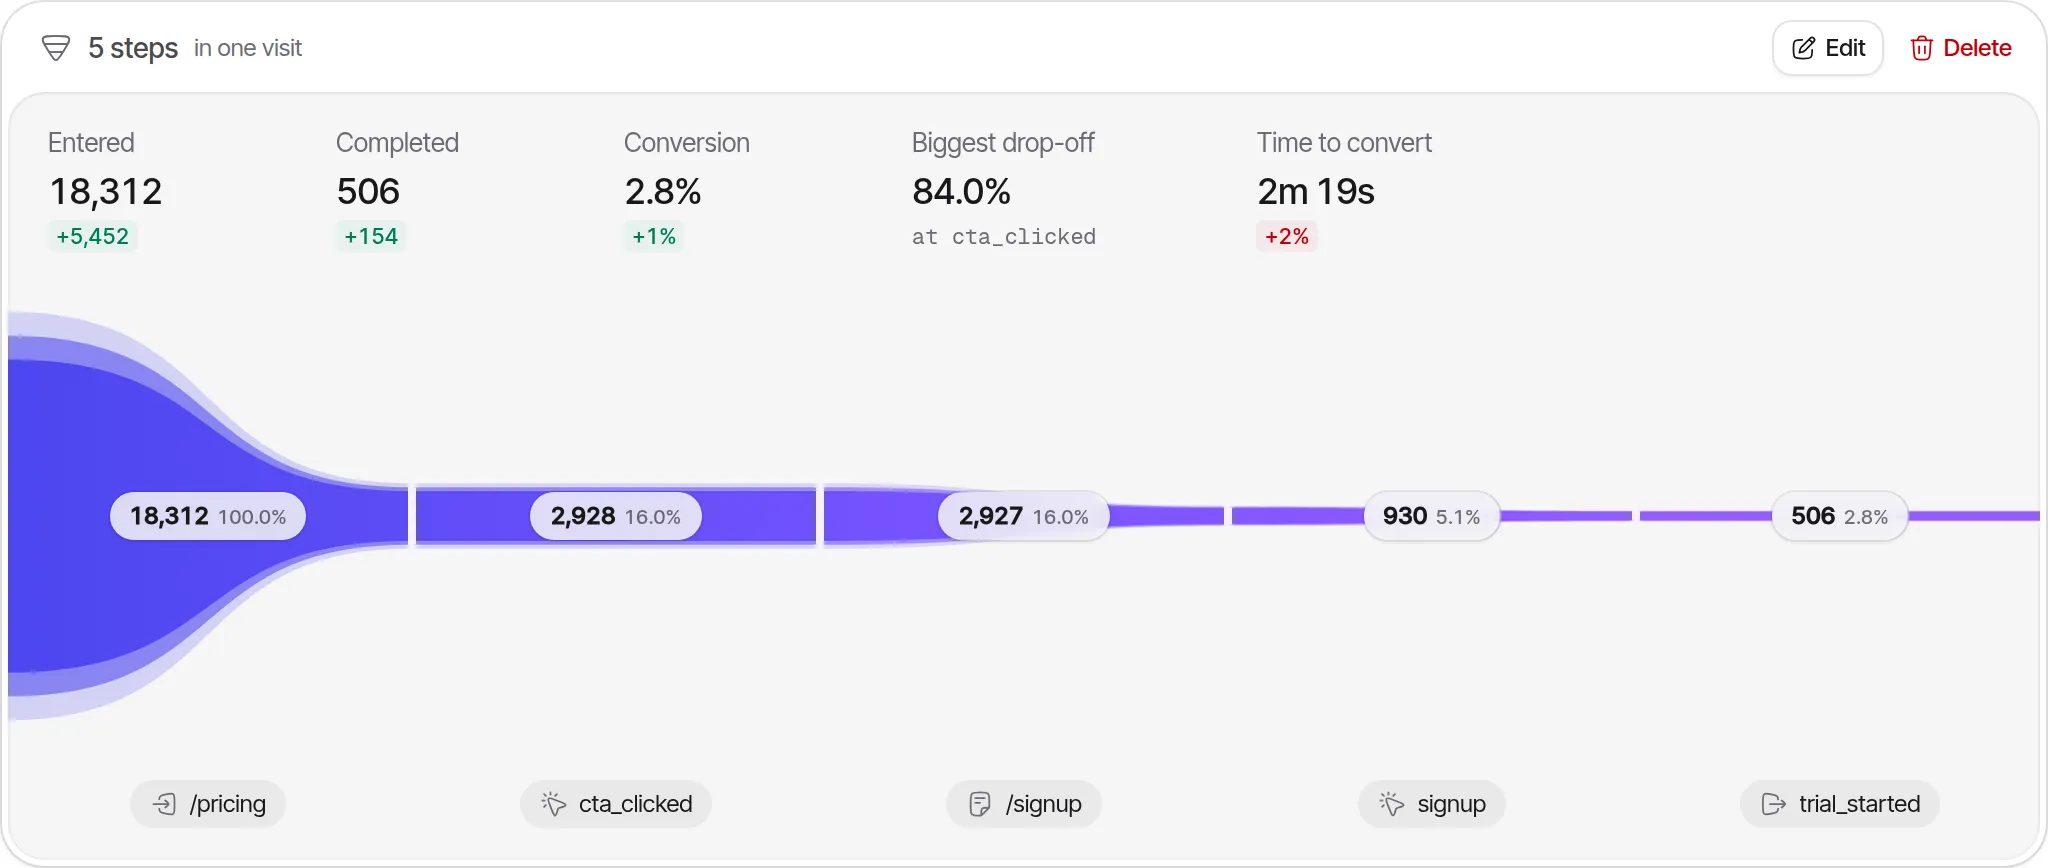
Create a funnel in the dashboard’s Funnels view, with each step set to a page or an event:
- Page
/ - Event
cta_clicked - Page
/signup - Event
signup_completed - Event
purchase_completed
A funnel takes 2 to 8 steps and shows how many visits reached each one and where they dropped off, split by source, country or device. It counts steps within one visit, which is why the server events have to join the visit: one that misses it starts a visit of its own, and the funnel loses that person at the step before. See funnels.
Within one visit also means this funnel measures people who sign up and pay in the same sitting. Someone who pays next week still counts in purchase_completed, on that later visit.
The same steps in Plausible, Umami and PostHog
The practices carry over to other tools; the calls differ. As of November 2026, from each vendor’s own docs:
| Step | invisit | Plausible | Umami | PostHog |
|---|---|---|---|---|
| Start in the App Router | init({ site }) in a client component |
init({ domain }) from @plausible-analytics/tracker |
The script tag with data-website-id |
posthog.init() in instrumentation-client.ts |
| Client-side page views | Automatic | Automatic | Automatic | Automatic with defaults: '2025-05-24' or later |
| Event in the browser | track(name, props) |
track(name, { props }) |
umami.track(name, data) |
posthog.capture(name, props) |
| Click without JavaScript | data-invisit-event |
class="plausible-event-name=Signup" |
data-umami-event |
Autocapture, plus data-ph-capture-attribute-* |
| Event from your server | invisit.track() |
POST /api/event with the visitor’s User-Agent and IP |
POST /api/send with a User-Agent |
client.capture({ distinctId, event }) in posthog-node |
| Goal | conversion() |
Add the event as a goal in site settings | Goals report | Conversion goal on the web analytics dashboard |
| Signed-in user | identify(user.id), stored hashed |
No equivalent | umami.identify(id) |
posthog.identify(id) |
| Leave out your own visits | #invisit-ignore |
Block your IP, or set localStorage.plausible_ignore |
localStorage.setItem('umami.disabled', 1) |
Filter out internal and test users |
Sources: Plausible (npm package, Events API, custom events), Umami (tracker functions, events, sending stats, own visits), PostHog (Next.js, config, autocapture, conversion goals, internal users).
Two differences change the code, not only the names. Plausible joins a server event to a visit by the visitor’s User-Agent and IP within 30 minutes of their last event, much as invisit does with the request you pass. PostHog links it by id instead: its tracing_headers option adds X-POSTHOG-SESSION-ID to requests to your backend, which survives a visitor’s address changing mid-visit, where an address-based join like ours does not. That id comes from state posthog-js keeps in the browser by default, the storage this guide avoids.
Our full comparisons cover Plausible, Umami and PostHog.
Common mistakes when tracking signups in Next.js
Three mistakes break signup numbers: counting the click instead of the result, putting personal data in events, and sending one event from both the browser and the server.
Sending the event on click instead of on success
A track() in the submit button’s onClick counts every attempt: invalid input, taken emails, double clicks and dropped connections.
// Counts attempts, not signups. Send it where the account is created instead.
<button type="submit" onClick={() => track('signup_completed')}>
  Create account
</button>
Putting emails in event properties
track('signup_completed', { email }) and identify(user.email) put an email address where only an id belongs. invisit drops property keys that look sensitive, such as email, replaces email addresses in values with [redacted] and strips email from recorded URLs, but that is a safety net for mistakes. Send the database id, plus the attributes you will filter by, such as plan or method.
Double counting from the client and the server
A track('signup_completed') in the form’s success branch on top of the route handler’s event counts every signup twice and bills it twice, since custom events and conversions are both billed. A success page that sends purchase_completed on every load does the same on each refresh. Give every event one sender, as in the table at the top.
A smaller one with the same effect: a production ingest key in .env.local turns every local test signup into a real one.
Checklist before you ship
-
<Analytics />renders once, inapp/layout.tsx, with the site id fromNEXT_PUBLIC_INVISIT_SITE. - No route-change code sends page views; the tracker already follows client-side navigation.
-
proxy.tscallsinvisit.handle(), andinit()hasbaseUrl: '/_i'. - Marketing CTAs carry
data-invisit-event; the signup form does not. -
signup_completedis sent once, after the insert: from the server, or as aconversion()in the success branch, never both. -
identify()gets the database id, never an email address. - The webhook sends
purchase_completedonce per Checkout Session with the visitor kept at checkout, then forgets the address. - Previews and local development report to a second site with their own key.
- Allowed domains on the production site lists your domain.
- Each browser you use has opened your site with
#invisit-ignore. - A funnel from
/topurchase_completedis saved.